You’re a builder who specializes in Passive House. You and your family live in a cold Maine climate. How long can it be before you start your own Passive House retrofit?
For Jesper Kruse, owner of Maine Passive House in Bethel, the inevitable retrofit has been a phased multiyear process that is finally coming to a close. Kruse built his almost 2,000sf house in 2000, six years before he knew about Passive House. By 2014 he had started the retrofit, fitting it in when he could among his other projects.
The original house was built with 2 x 6 walls sitting on a slab insulated with 2 inches of EPS, on top of uninsulated frost walls. The first floor features a kitchen, dining and living rooms, a half bath, and a large entry with a frequently used porch. The second floor has three bedrooms and an office plus a full bath. He and his wife—and sometimes others as well—have been slowly going around the house, one side at a time, upgrading each assembly.
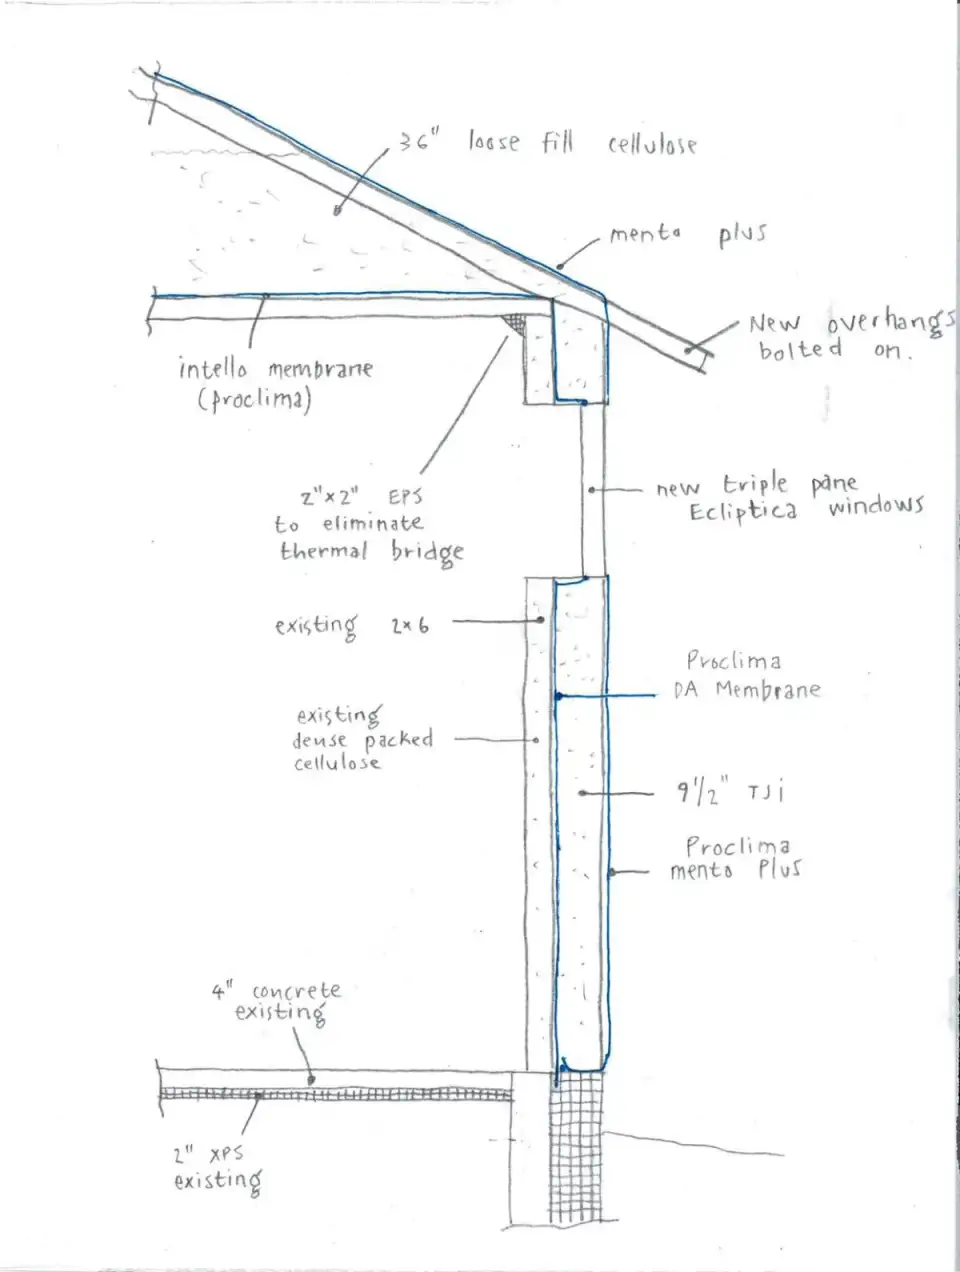
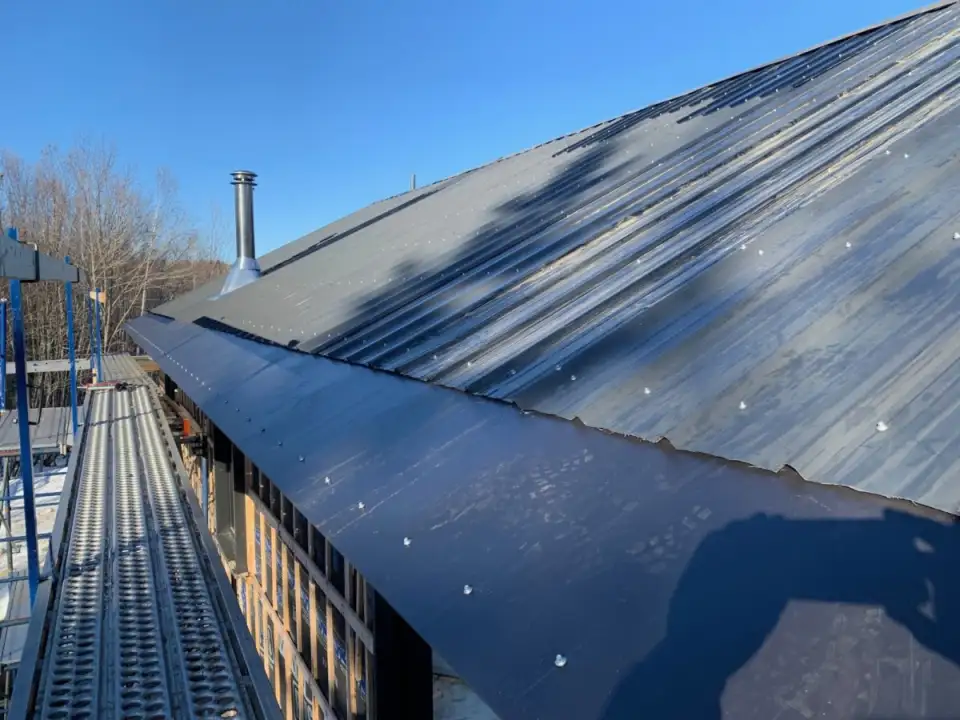
Addressing the frost walls was fairly straightforward: Kruse excavated around the foundation and added 10 inches of EPS. For the above-grade walls, they removed the existing cladding and windows and applied an air barrier membrane with a low-perm rating from the foundation up and over the existing sheathing. They then bolted truss joist I‑beams (TJIs) to the existing framing, which they packed with cellulose, and added an airtight, vapor-open membrane on the exterior and reverse board and batten for the siding. New overhangs were bolted to the sheathing. The windows were replaced with high-performance triple-pane units that Kruse imported directly from Denmark.

For most of the walls, the amount of insulation in the new vapor-open assemblies has almost tripled, from 5½ to 16 inches of dense-packed cellulose. The wall that borders the 8‑foot porch, though, was a conundrum, because thickening the walls subtracted from the deck area. Kruse whittled down the size of the TJIs there to 3½ inches. Having modeled the change in the PHPP, he was surprised and relieved to find that the modification did not change his overall heat loss through the walls that much. He finally finished the last two walls last year.
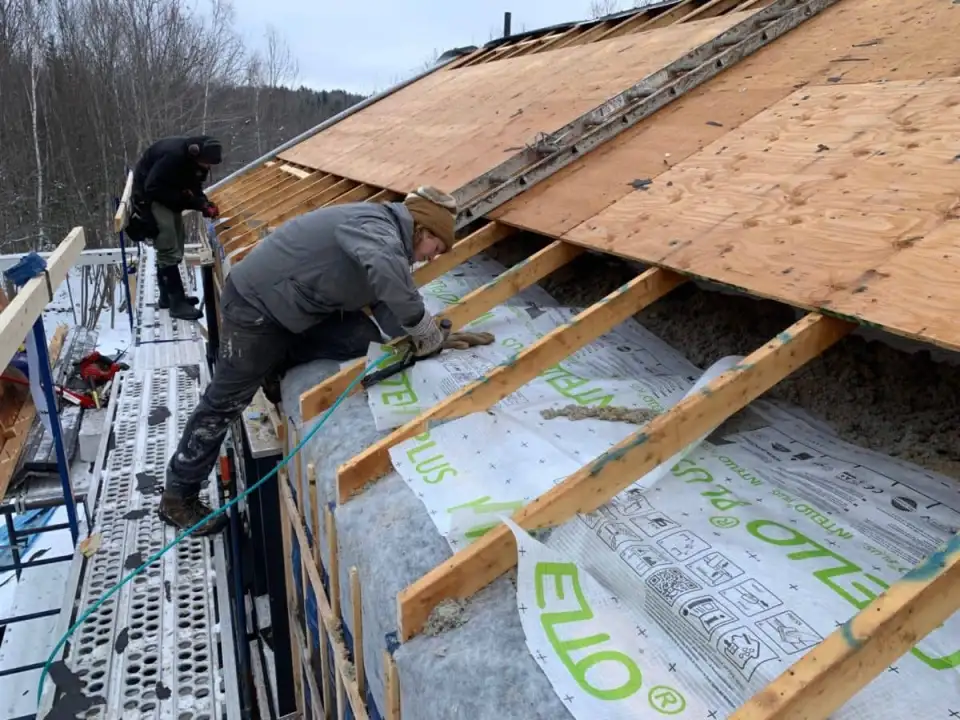
Retrofitting the roof assembly has been a more complicated task, which only got fully tackled after a conference presentation Kruse attended on potential moisture problems in unvented roof assemblies. The speaker emphasized the need for a really good vapor retarder on the warm side of the assembly. “Originally we were going to run an exterior weather-resistant barrier right up over the roof,” says Kruse. “I got cold feet about relying on that.” He decided to supplement this approach by installing a vapor-permeable air barrier membrane on the attic floor, a process that was complicated by the presence of trusses at 2‑foot intervals, not to mention the 16 inches of loose-fill cellulose that had to be shoveled out of the way. That task got under way in early summer but had to be postponed until late fall, because the attic environment was unbearably hot.
In the corners where the walls meet the attic floor, Kruse installed 2‑inch by 2‑inch pieces of EPS to alleviate the thermal bridging where the low heel of the truss intersects with the wall.

The interior of the house has not been touched except for the window rough openings. With no place to run new ducts for a ventilation system, Kruse chose a balanced decentralized ventilation system.
The home’s open floor plan was a big benefit when it came to devising a new heating system. One mini-split heat pump unit hangs in the living room, helping to keep the house tolerably warm, or at least above freezing on the coldest nights. Last winter, before the final two walls were upgraded, supplemental heat was needed, especially for the upstairs bedrooms. Fortunately they have a wood stove and live on a forested lot. “Firewood is free and readily available,” says Kruse, “so the reality is that we are heating with the wood stove and using the mini-split as backup.” With the wood stove in the middle of the house, he has had to create a dedicated air supply to it and replace the existing chimney with a better-insulated metal one. In a comment that will be all too familiar to many home retrofitters, Kruse sighs, “Everything is a big project.”
With all of this work, Kruse was extremely pleased to find that he hit 0.5 ACH50 when he conducted his final blower door test last fall. Still, the home is not quite meeting all the EnerPHit targets. Kruse ascribes this shortfall to key preexisting conditions. There isn’t enough insulation under the slab, but he’s not changing that. He also won’t be redoing the existing rough openings, even though the window placement is not ideal for maximizing heat gain during the winter.

What is ideal are the benefits the retrofit has brought to his family. His kids hang out comfortably in the windowsills even in the dead of winter. And the snugger home is more resilient when the power gets knocked out by an extreme weather event.
There are also marketing benefits for Kruse, whose company has grown in recent years and now has ten full-time employees. He can speak at first hand of the increased comfort, sometimes persuading clients to do just a little bit more. He recently retrofitted an old three-story barn, creating a new restaurant on his clients’ very tight budget. They became receptive to many Passive House elements, according to Kruse, including airtight construction, an ERV, and minimized thermal bridging. The one element that unfortunately could not be made to work with the budget was triple-pane windows. “We pushed it as far as we could,” he concludes.
That’s what Kruse did with his own house and with every job he works on, to ensure that Passive House levels of efficiency and comfort, or as close as possible, are built in.
Passive House Metrics
Heating energy 11.8 kBtu/ft2/yr
Cooling energy 1.02 kBtu/ft2/yr
Total source energy 24 kBtu/ft2/yr
Air leakage 0.54 ACH50