
If we’ve learned anything through our experience with Passive House it is that the details and installation approach are constantly evolving. This is through value-engineering analysis and a feedback loop with contractors, and through this lens, we find ourselves in an interesting time within our office. For instance, our firm currently has several Passive House projects at different phases of construction, managed by diverse personnel within our office, utilizing different passive consultants, all constructed by a variety of contractors and subs. These factors have compounded into distinct air sealing strategies that are being employed simultaneously across our projects.
A Systematic Approach
This post is the beginning of a series that looks at these critical details, how we came to them, and how they differ from project to project. Easily replicable; they constitute a systematic approach to building a Passive retrofit.
Beyond the particular ways to detail an assembly or connection, we have found that the only way to truly push the methods and processes critical to building a successful Passive House is to create a method that allows the pool of consultants, contractors, and designers to engage each other in a group setting that promotes a holistic perspective to design and building solutions. This is described in a related article, A Collaborative Approach.
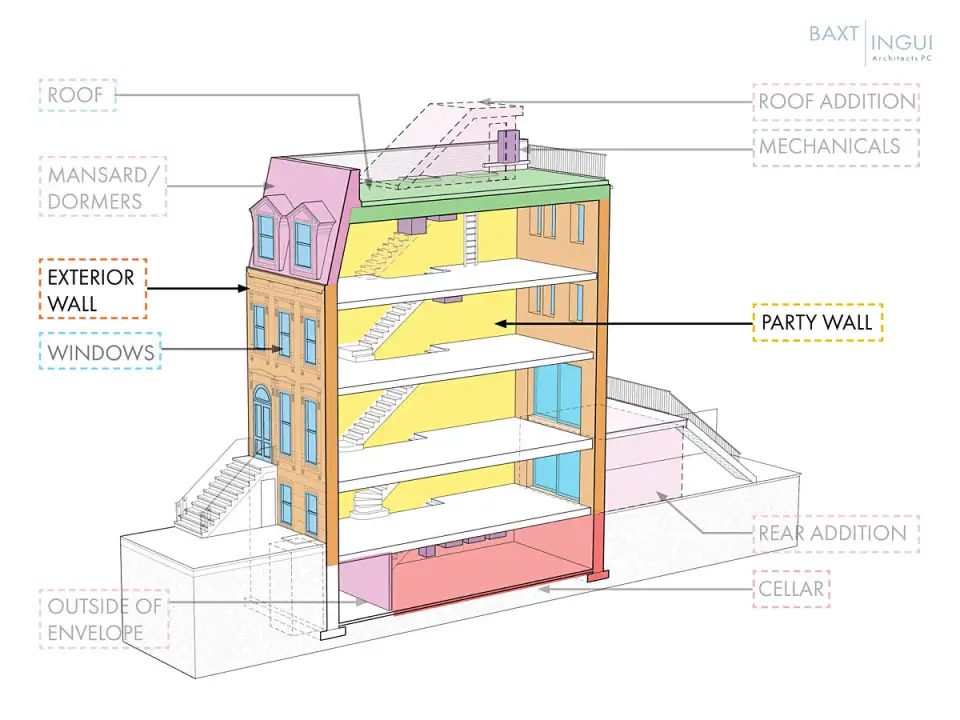
Exposed Walls
Exposed walls constitute the largest air sealing challenge and have many transitions to fenestration, sidewalls, concrete slabs and roof. Early in the process, our firm decided to concentrate on insulating and air sealing from the interior. It is important to us, and to most of our clients, that the fabric of the streetscape and historic nature of the facades remain intact. We also feel strongly that the end result should not look like a cliched “passive house”, but should feel and present itself as a thoughtfully designed, well-built space. In other words, we see Passive House as a methodology for construction that informs design but does not drive it.
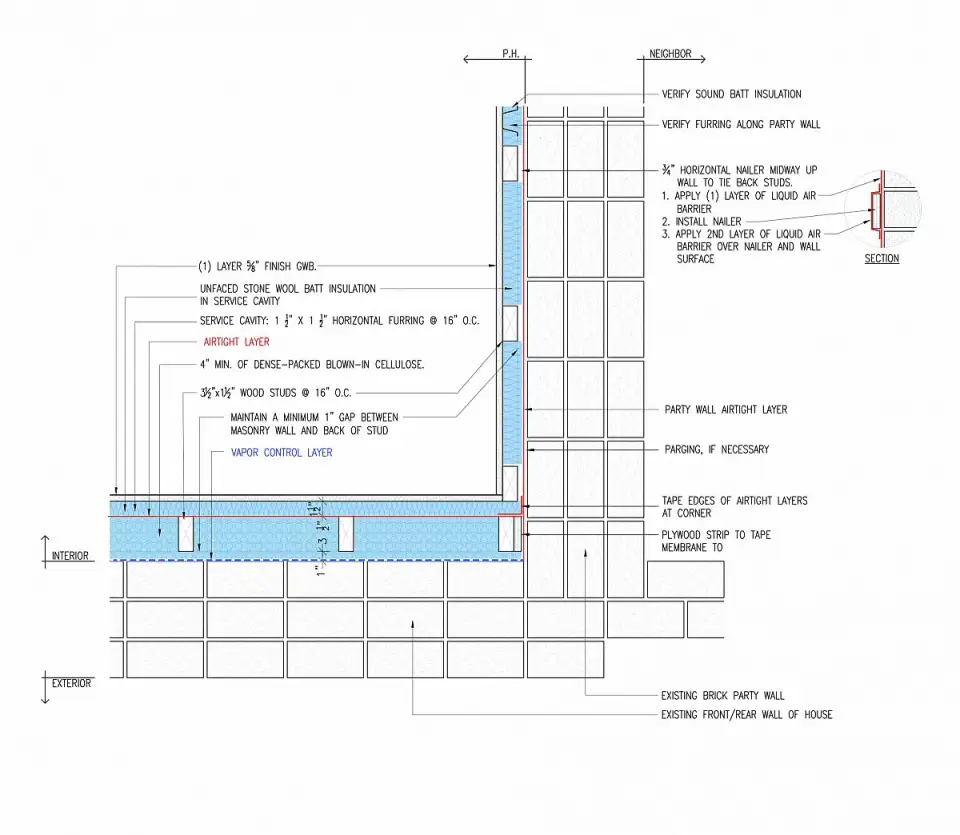
Exposed Wall to Party Wall Detail
The detail above depicts a typical corner condition where an existing exterior wall meets a masonry sidewall in a mid-block rowhouse (i.e. party wall not exposed to the elements). Highlighted are material choices that differ depending on application, circumstances and the builder. Some air sealing strategies work better for certain situations than others, and a combination of methods can often prove most efficient and cost effective.
At first glance, this detail is not wildly different than a typical interior build-out scenario we often see in townhouses, albeit a bit more intricate when it comes to connections of one surface to the other. Here are a few key points:
1. Moisture management
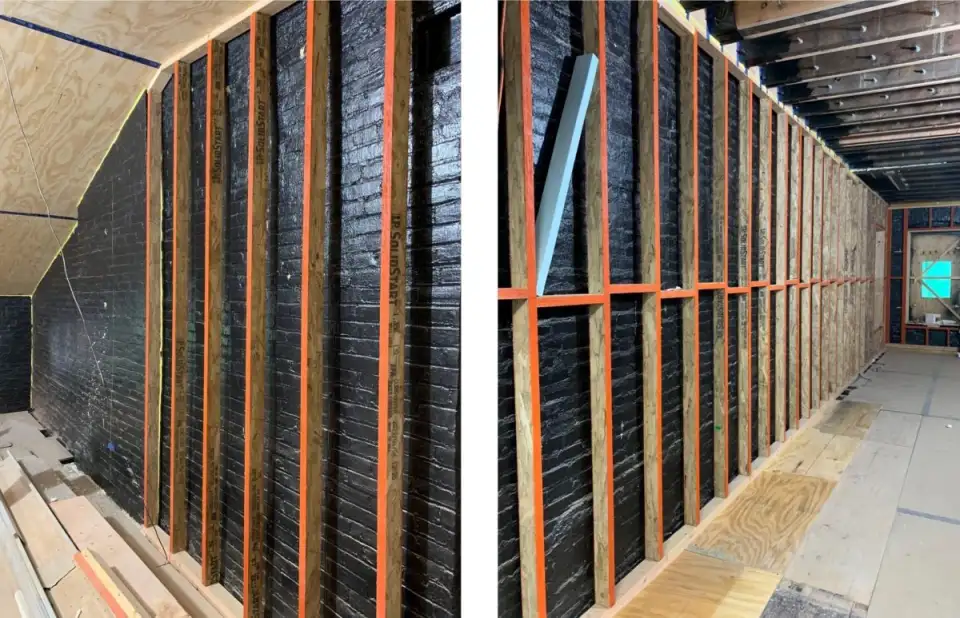
The projects we are concentrating on are all masonry buildings built in the mid 19th century to early 20th century. The brick used is extremely porous and the mortar soft by today’s standards. We may need to replace bricks, repoint, and/or parge the walls to restore structural integrity and prepare for Passive detailing. If we aren’t careful, we can inadvertently create a serious moisture issue. Our preferred method is to apply a liquid moisture barrier to the inside face of masonry and keep the exterior surface open to allow any absorbed moisture to easily escape.
2. No metal
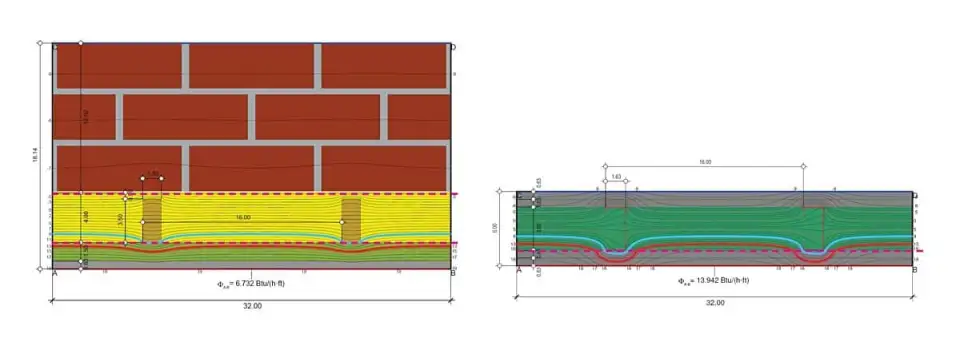
The framing inside the exterior surfaces of our projects is always wood construction. Wood performs better thermally than light gauge metal studs. An entire masonry façade with metal studs behind it has so many thermal bridges across its surface that it significantly reduces the value the insulation provided.
3. Air gap between conductive materials
We hold the wood framing a minimum of 1” off the interior face of masonry. This is such a small detail, but it makes a massive difference. It allows insulation to be packed into that gap and eliminate a potential thermal bridge.
It’s also worth noting that since many of our projects are retrofitting over 100-year-old masonry buildings, the exterior walls are not plumb or level (surprise!) Then, the decision is to either frame parallel to the irregular perimeter, or frame a squared room independent of perimeter. We almost always ‘square the building’ so each room is plumb and square. The trim aligns well, tile meets adjacent tile nicely, etc. This is one of those early decisions that has a noticeable impact on finish quality. This method can also lead to more than 1” of insulation in areas that required leveling, which should be reflected in the PHPP model. However, in come cases it may make more sense to frame parallel to the perimeter. For example, if a room is the full span of the house with multiple separate windows, we would likely want the window jambs to be equally distanced from the front of the finished wall.
4. The air barrier layer
This is where things get interesting. A long time Passive consultant and installer, Kevin Brennan, clarifies the categories of air barrier products: “sheets/boards, rolls/ membranes, and buckets/fluid-applied.” As we speak, we have projects in our office that are utilizing one or more approach simultaneously. The reasons for choosing one or the other are varied, but it generally comes down to what the crew is most comfortable working with, or the circumstances of detailing around a unique element in the project.
Eoin Killeen of Kleen Construction, notes that after completing a full renovation where both A/C grade plywood and Pro Clima Intello were used, the crew opts for A/C grade plywood with Pro Clima tapes at all seams because, as carpenters, every man on the job site was comfortable with the material and could install it quickly and efficiently. One advantage of plywood over sheet membranes is its durability on a construction site. It is not easily damaged. Trades on the project site cannot easily cut or rip the material and in fact, you have to deliberately make a hole. Taffera Fine Buildings & Finishes has completed several Passive homes, and notes one particular advantage of using plywood is how cleanly penetrations can be made for utilities, such as grommets, and how easily tape can applied to create the seal. On the flipside, as obvious as it may seem, plywood is opaque, it doesn’t billow out from the insulation behind it. It isn’t easy to track and visually inspect the insulation levels during installation. Plywood is also more expensive per square foot to purchase. However, some of that additional cost may be tempered by the efficiency of installation.
There are many options when it comes to sheet goods, as brands like Pro Clima and SIGA have several different options to choose from. One advantage in choosing this approach that can’t be overstated, is a manufacturer’s warranty and support. There is an incredible value in choosing a complete system from one company and having the support behind it on a project. These systems install quickly and are easy to make penetrations, and they work around difficult detailing such has windows and doors.
The third category, liquid-applied, is used extensively on our projects. As mentioned above, we use a liquid applied system such as Pro Clima’s Visconn on exposed walls for moisture management, but it can also be used to airseal the party walls. Partel’s Blowerproof and Sto Gold are two competing products that we have used on interior masonry walls for this dual purpose.
In the end, there is often a combination of approaches on any given house. In one particular case, where a project has the typical exposed masonry walls, SMR Craftworks has chosen Pro Clima Intello for the large expanses of exterior wall. But where there are challenging air sealing situations, such as a roof deck to glass wall connection, plywood is used.
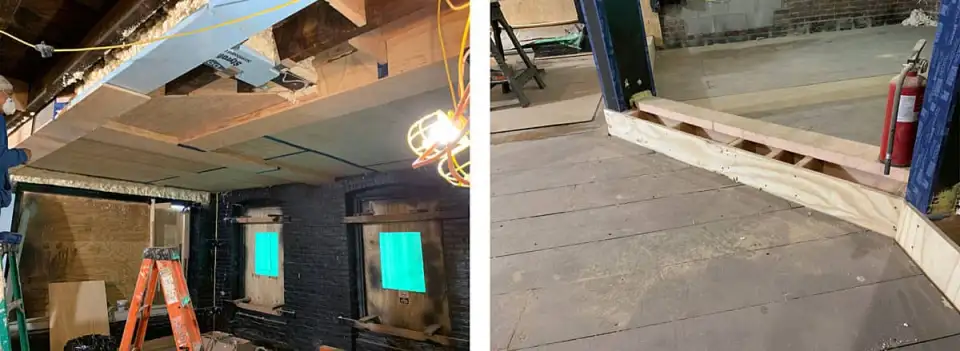
The carpenters can manipulate plywood easily to seal the angled wall from the underside ceiling through the joist cavity and to the sills of the doors (not yet installed in these photos.)
5. Blown-in insulation
Early on, we chose to almost exclusively specify blown-in dense pack cellulose. It has an R‑value of 3.4/inch, manages moisture well, and does not contain harmful chemicals.
We have looked at other options like mineral fiber insulation manufactured by Rockwool. This is an exciting product because it takes all the advantages of a batt Rockwool product, and increases the R‑value, is fire retardant, and can be spray-applied. The additive in the sprayed product allows the Rockwool to ‘stick’, similar to sprayed foam products.
This is important to the sequencing of the assembly because with blown-in cellulose, the air barrier must be installed first, then holes are cut to feed insulation into the cavity. This can be counter-intuitive for some installers. Spray-applied mineral fiber adheres to the brick face and studs so you can frame first, insulate second, then install your air barrier.
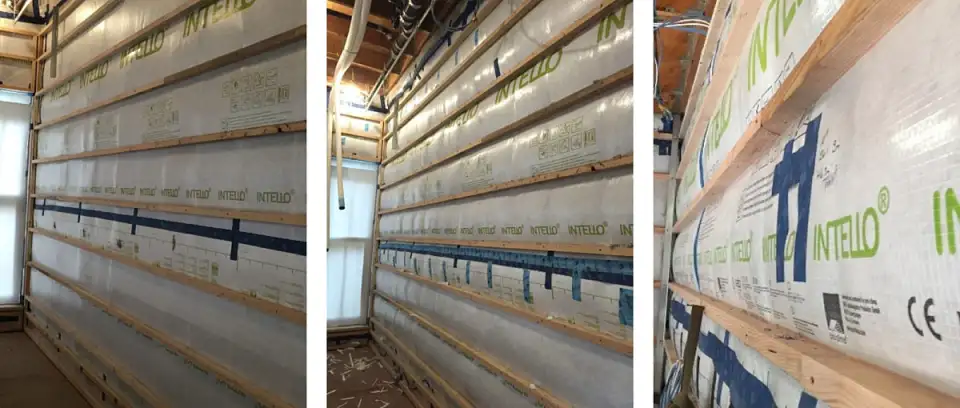
6. Service cavity
This space serves a few important purposes:
a. The horizontal furring (we typically rip 2x’s in half) holds the air barrier in place once the insulation is packed in. Note that the staples used to install the air barrier are not enough! We’ve learned the hard way, especially for a horizontal application (like the roof) – more on that later.
b. The service cavity is where electric receptacles, switches, etc. live on the “interior” of the home. It also serves as a buffer to protect the air barrier from typical homeowner personalization, such as hanging hooks or artwork on the walls.
Stay tuned for a close look at other important details in Passive retrofits, as the series continues.