Kevin Brennan kicked off the first Passive House Live Construction Tech edition with a talk about airtightness lessons learned onsite. In this video, Kevin discusses the technique, technical, and technology needed to ace your blower door test. with onsite footage, solutions for leaks, and steps on how to prevent them. Watch the video above or read the transcript below.
Kevin Brennan:
This month on Passive House Live we are talking about airtightness. Last week we had Ed May on, he described 10 ways to ace your blower door test. I'm going to try and dive down into a little bit of technical technology and the technique of air barrier systems. But airtightness is quintessential to Passive House. Airtightness's driven my career.
Early on, if you watched the dense pack episode, I went through the career path which I've had. I started in weatherization and early on, I was able to learn how to use a blower door. And using the blower door, I was able to solve so many problems because you make the invisible visible, or you make the invisible tangible. Very early on I was taught that anything that can't be measured can't be saved, and you can't hold people accountable.
So airtightness's become almost like a level of pride in my world of energy efficiency. So I would always ask at conferences before I discovered Passive House like, "Hey, what's the best blower door number you ever got? How low have you been able to go? Airtightness is a good thing. But how low were you able to go?"
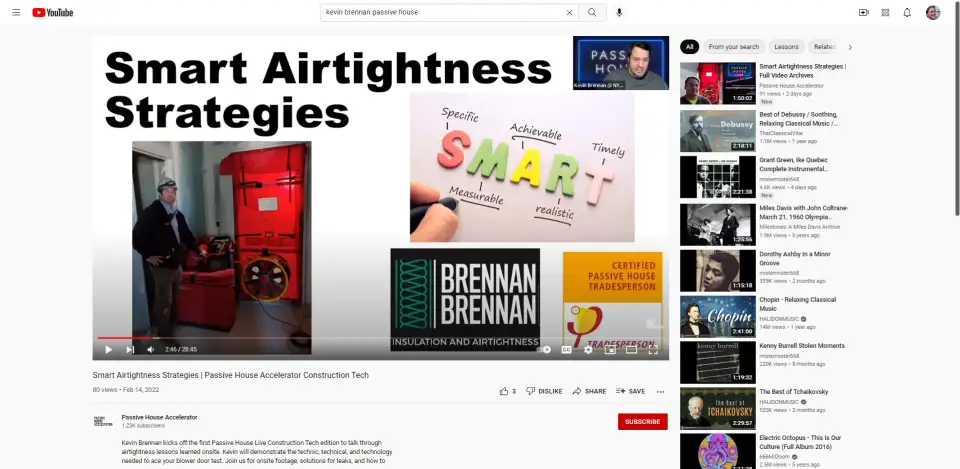
So that's kind of where my drive has driven me. So we'll take you on this little journey here through my slides. So my name is Kevin Brennan. This is SMART airtightness strategies. That is my former lighter self working on the Cornell Tech project, doing blower door testing on a 27-storey building checking room by room, apartment by apartment, little leaks by little leaks to just make sure that that project hit its airtightness goals.
I was brought in by the GC team to be kind of like their ASS, their airtightness supervisor, and we did a decent job. We hit our goals on that project that nobody thought was achievable. So when we say SMART, the word smart in my opinion means Specific, Measurable, Achievable, Realistic, and Timely. All right? So when we say timely, meaning it has to happen at the right time.
So I've been teaching the Passive House tradesperson course for about eight years now and it's been a great experience to get like-minded people in a room and to talk about energy efficiency in Passive House. So it's very exciting to see the change process that happens when teaching somebody about the best of building science or building better, or as I would like to say it, putting your boots on, going to work and doing the best you can to make the best building for not today, but tomorrow. It's something I take pride in and it's something the people on my team take pride in.
So by teaching the tradesperson course, I've shared that experience with other people. And I was like, "I want to do this work because I'm a doer. I want to actually put my hands on the work, get it done and prove that my knowledge, skills and ability give me the option of doing that." So I started Brennan Brennan Insulation and Airtightness. And that's what we focused on. Dense-packed cellulose, installing air barriers and insulation systems.

And the only kind of trick that's in our thing is that we use all the tools and the technology in our practice. We do our own testing up until the end and then we have a third party come in if we need. Why is airtightness so scary, right? So I have a conversation with the builder. You can do Passive House and they are terrified, absolutely terrified of airtightness. Why? Because it's the fear of the unknown. They've never done it before, so everyone's a little scary to walk in the dark at night and not know how to get there.
And that's the problem with airtightness is that you can't touch it, you can't feel it. It's something that's very unknown. General contractors, project managers are afraid of it because they haven't done it before and they don't know the process. It's not a common practice to shoot for super airtightness and to put your money where your mouth is on a project to say that I'm guaranteeing this airtight project.
The other reason why it's very scary for people is the details are hidden inside the wall or under the cladding. So if you keep your schedule going for the project, whatever you're working on, you only get one chance to fix and see them. So we acknowledge that it is a scary process. But like everything in life, it takes technique. And the technique is, I'll go through it, is being smart. And the way it's being smart is using the systems is what I say and using a model.
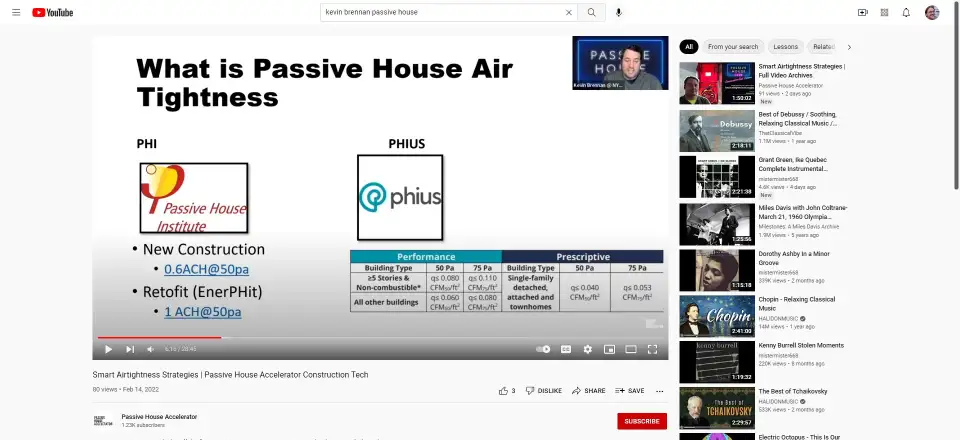
So over 25 years ago, PHI started Passive House with Dr. Feist's project and they hit airtightness. They hit super airtightness. They hit, I think, want to say 0.25, 0.3, air changes per hour on that first project. And they set the standard slightly leakier at 0.6 air changes per hour. So PHI's new construction airtightness standard is 0.6 air changes per hour. The retrofit, the common buildings I work on at brownstones is one air change per hour. And I didn't put it in the slide because it's really not relevant, but the New York State code minimum requirement right now is three air changes per hour. Okay?
And when you read the code and you read the documentation, all it says is continuous air barriers from top of wall, all the connection details, no voids, it's penetration filled. So if you looked at the wording of the code, it says you need a continuous air barrier. The difference between a continuous air barrier at 0.6 air changes per hour and 0.3, it's the tolerance. It's how many mistakes are you going to allow? How many penetrations are you going to allow to go unsealed?
On the other side of the coin, we have the Phius projects. And Phius has taken a different approach towards airtightness in that instead of measuring the volume of air inside the building, they're going for the Q50 number, which is the permeance of the surface area of the building. So a bigger building, same number whereas if you have a larger building with a high surface area to volume ratio, it's going to be easier to hit 0.6 than it would be with the Q50 number, which is for a noncombustible, it's 0.08 and for all the buildings, it's 0.06 at 50 Pascal.
Then there's the prescriptive path as well through Phius, which I'm not as familiar with, and that is 0.04. So if you can hit 0.04, that's the prescriptive single-family of detached townhouses. They also have a slightly different method of measuring the airtightness. They do an air barrier integrity test where they mask up all the intentional openings and measure only the airtightness of the air barrier and then they do one with the masking removed. So there's just slight nuance difference between the two testing standards.
The Phius one takes on ASTM E779 which is an American standard and PHI takes on the EN13829, which is a European norm standard. Both are the very similar processes. I'm done with the nerd numbers. You guys can all wake up now and now we're going to move on. All right?
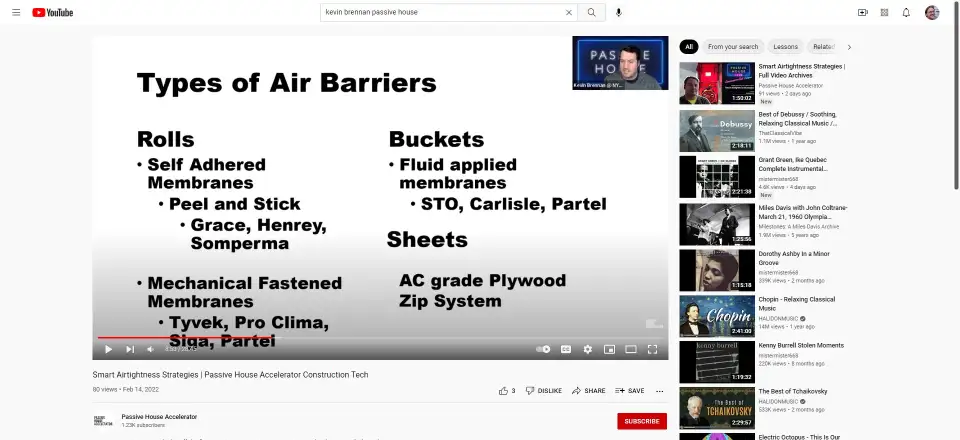
So when we talk about air barriers, we have types of air barriers. We have rolls, right? So the rolls. Self-adhered membranes, which are peel and stick, Henrey, Somperma, Grace. We have mechanically fastened membranes, which are your Tyveks, your Pro Clima Intello, the Siga membranes, internal, external Partel, all different mechanically fastened membranes that go on the wall, they're able to be an air barrier. And they're either stapled or glued or they're cap-screwed onto the wall, either inside or outside.
And then the next types of products we have, we have buckets or fluids. And those fluid applied membranes could be STO, Carlisle, Partel's fluid applied membrane, the Visconn, which we've had a few videos on and go across. And then we have sheets. So sheet goods. We have the zip system, which is very popular in the US market here of installing your sheathing with an air barrier on it and treating the seams. We also have the AC grade plywood, which is common that we use on the brownstone projects because a lot of the GCs that we work with their background and history as carpenters like installing heavy, robust walls. But the AC grade plywood, as we know, the price has gone through the roof with the pandemic.
So when we say AC grade plywood, it's A face, which is no knots, no defects, three-quarter inch thick. The C grade is on the other side, maybe some knots, just a level of quality that is required. You could take the chance to use an OSB, but there has been chances of it being not airtight over time. Chris Corson has a great story about how he knows Zehnder's ERVs float and it's a great story. We'll get them on to tell it one day.
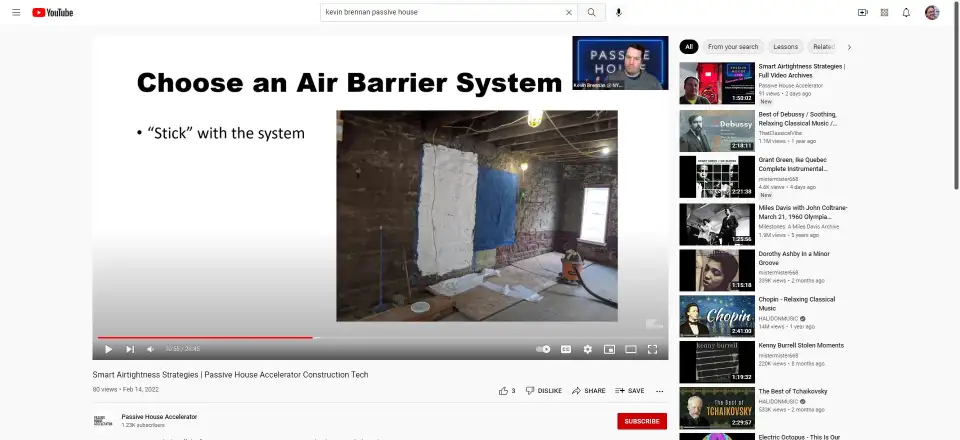
So the strategies of hitting airtightness, all right? My, A, number one strategy is choose an air barrier system and stick with it, right? So if you choose Pro Clima and you use an Intello or Visconn, stick with the family of products. The Vanas, the Profil tapes, the Solidos, all within their range from inside to outside to the window, all the way around with one system. So that you can go from subgrade connected to the vapor barrier, subgrade, up the wall with the membrane.
And then all the seams are taped with a common tape, with the pressurized acrylic adhesives, and then marrying it up to the roof and the ceiling with the Intello on the inside. So you have one air barrier system that connects all the way around. And then one of the things that Ed mentioned last week was that red-line test. That red-line test is a great check two dimensionally of your air barrier system.
I live in a three-dimensional world. And my three-dimensional world, I need to make mock ups and I need to check those details. So every time Ed said, "You make that circle and you check a detail," I'm going to go in with my team, the GC, and we're going to like a mini mock up. We're going to rough that out. I'm going to push that system to the edge of when it's going to fail. Because 90% of the time when those systems fail it's because we didn't read the instructions and all the systems need to be clean and dry to stick. I could show you some horror show pictures, the first project we worked on, but let's stay positive here.
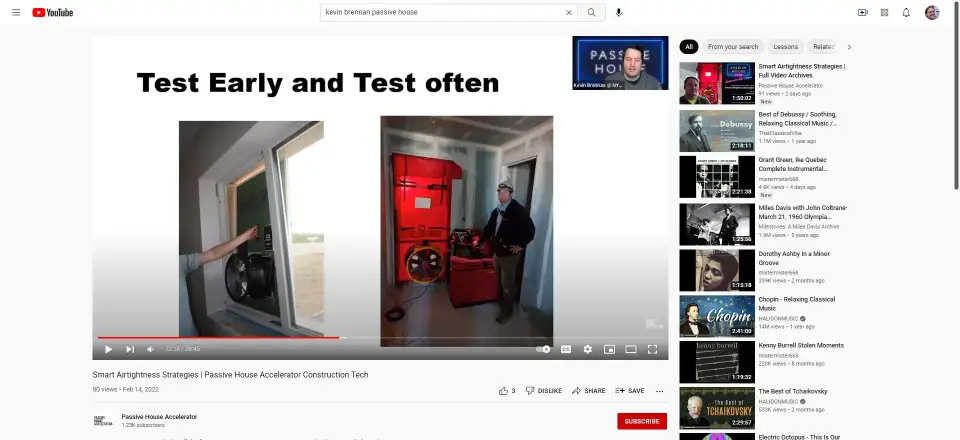
So the other strategy towards airtightness is test early and test often. All right? So this picture on the far left is a picture of a Minneapolis duct tester in the Rochester Passive House done by my friend, Matt Bowers, up in Rochester and his team that did that project. And I was very lucky to meet Matt at the tradesperson course. They came down from Rochester to take the tradesperson course and I followed this project along on his blog. And they were able to take a blower door and put it in the window and test as they went along.
So as soon as their windows were in their, air barrier is complete, they kept testing early and often. The picture on the right is of an apartment that's semi-finished that the air barrier is up on the wall and we're testing and trying to find the little mistakes before they get hidden. The general rule of thumb is before you put up the finish in the sheet rock that you've gone through and checked, or have confidence that those systems that you've put in place are as airtight as you potentially could make them. Either they've been checked with visual inspection or they've been checked with pressure and smoke.
Visual inspection goes a long way, but when you have a new team and a new system that doesn't what mistakes look like, it... I'll show you some instance of it. You have to kind of like train their eyes how to see the invisible. One of the goals of my projects that I work on is to get the air barrier on the wall cover the windows, cover everything with the membrane and then run my blower door. And I have one solid air barrier all the way around, all six sides of the project. And then I know my air barrier system is at 0.3 air changes per hour. And then my next blower door will happen when the windows go in.
So now the windows went in and now we're at 0.4, which got slightly leakier. And then all my penetrations happen. HVAC, electrical, everything's happening there. They've been all detailed. The front doors go in, the complex systems happen and we're at 0.6. And our goal is one air change per hour. That is a testing plan. And that's something that needs to be coordinated. One of the goals of my career that I hope to see is that on a set of plans, everyone has a detail of the Passive House plaque that goes on the wall that it's detailed there because you have confidence that you're going to achieve it.
And the other thing that I would love to see on every project is scheduled blower door test on the Gantt chart of the schedule that is, that blower door test is drywall can't happen until we pass our initial blower door test. All right? Windows can't be trimmed out and finished until we pass our blower door test. Final handoff, the ERV commissioning can't happen until our final blower door test is in place. That's your testing plan is what I hope.
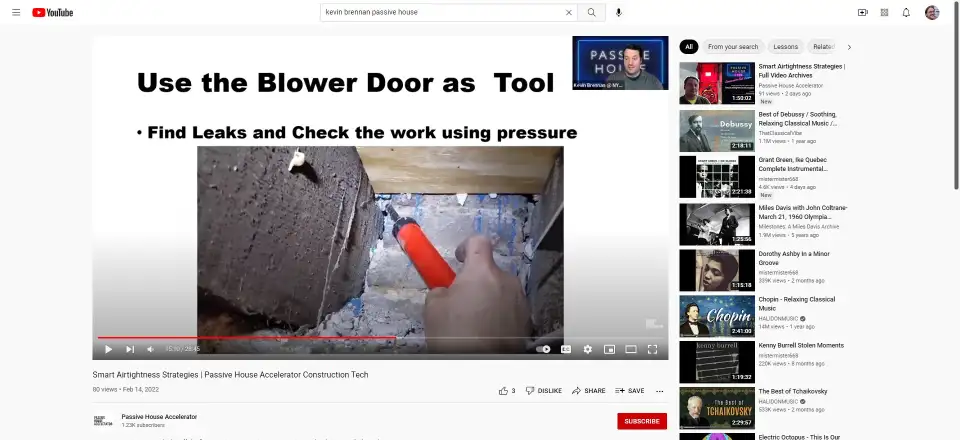
So here is a... I'll play this a few times, but you're going to use the blower door as a tool. And the tool to find the leaks and check the work using pressure. My trick of my trade is to take a fan somehow, put it in the building either in a window, a back door, through a skylight, a negative air machine, a fan and a can, doesn't matter what it is, but somehow I'm building pressure on the building either at 50 Pascal or 25 Pascal. And I use that smoke stick with pressure to find every one of those leaks.
This was not one of my projects. This is a project I was hired to do a blower door on. And the air barrier wasn't executed that well because the team wasn't trained on that every one of those joists need to be cleaned. They need to be sanded down. That 100-year mummy dust that's on that joist needs to be broken down to its original fibers and all those gaps and cracks need to be filled with either a sealant, a foam or a mortar, and then coded with the air barrier on there.
It also needs to be clean and dry. That pile of dust and debris down at the bottom there does not let those air barriers stick. Plus this is a very difficult spot to work on. This is the front of the building, your head's up in a joist, not easy to do.
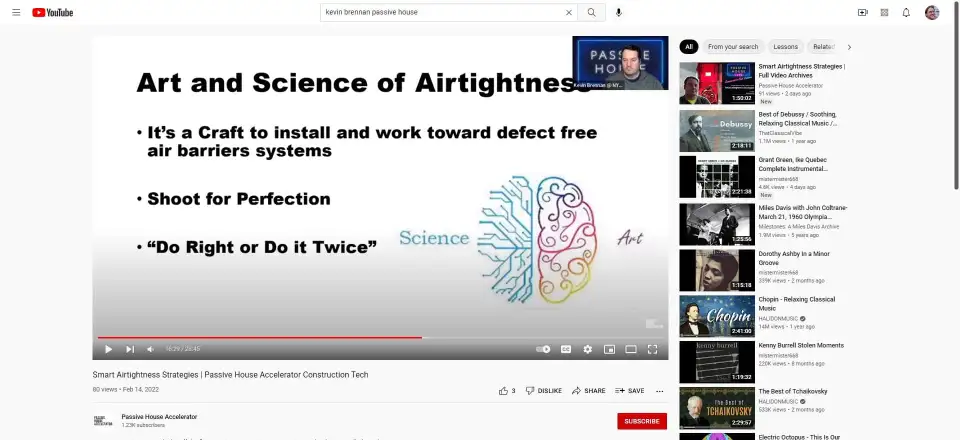
Installing air barriers is in art and a science. I never consider myself an artist, more of a fartist than anything else, but it's a science. So you balance the art of your craft and the perfection of installing something. First time you do it, it's a mess. It looks like a Picasso painting and then you get a little and it starts to look cleaner and better and the lines are starting to come together. And then at the end it's like, "Oh wow, I'm getting really good at this." Everything looks perfect. It is perfect.
And the science of airtightness is knowing the technical capacities of your materials and those technical capacities of your materials is, is it going to stick? Is it going to be long term and durable? Did I read the instructions? Are they clean and dry? If I'm using fluids, the fluid applied air barriers, what thickness do they need to go on? How do I check that they're on at the right thickness? And is it fully adhered or semi adhered?
So the craft of airtightness and the skill and the goal of me sharing and being a part of Tech Tuesdays is to create air barrier installers of tomorrow that go to work and get paid really well and take pride in their work throughout the world. That think, "I'm an air barrier installer." And that's a job title as if it was just as if you were a carpenter or a plumber, but you're taking great pride in it. Just like the pride craftsmanship of a finished carpenter.
You can't tell a finished carpenter to hurry up, just get it done. They'll walk off the job and they'll say, it's either done perfect or it's done at all. And that's the same integrity that you need as the air barer installed because perfection takes time. It takes the ability to work clean. It takes time to check it. So you're shooting for perfection.
On my prep for the session I listened to one of the podcast by PHI, Georgia Tsar, and she said there was a German phrase in Germany that you pay to do it right once or you pay to do it twice. And I think that's what we really need to develop in our culture as well, because do it right once or do it twice. It's that same way. Because installing an air barrier comes through.
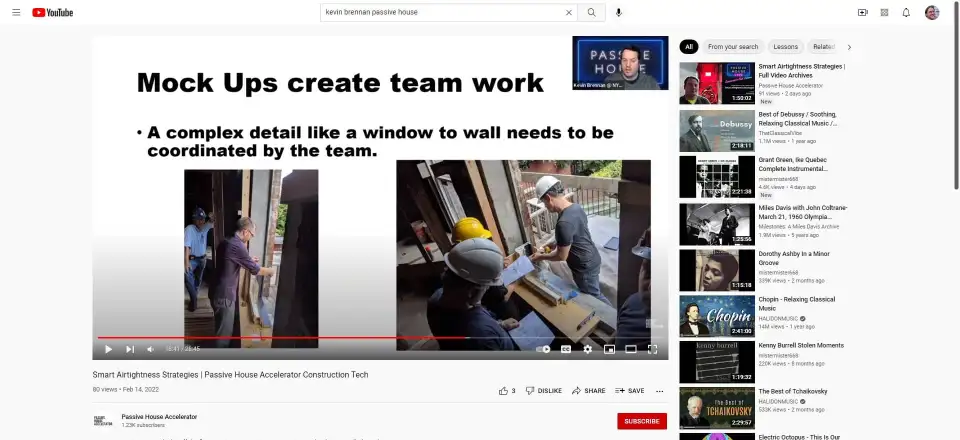
The next strategy or process that I like to do is mock ups create teamwork. All right? It's a complex detail like a window and a wall needs to be coordinated by the team. So that is the architect of the project from Mike's team. That's Frankie, that's a Baxt Ingui project and the GC needed a corner sample of the window. So with the technical details, the finished carpenter made a mock up out of Plexiglas and wood to scale that was spot on and perfect. And we talked in that rough opening of like, what were the critical details of that?
It needed to be drained to the outside. There needed to be a backstop. It needed to be flashed at the bottom. How are we going to make it airtight? We're going to use fluids going to the inside to the rough opening. We're going to tape it on the outside. We're going to tape it on the inside. What were all the details that we were going to need to get done?
The gentleman on the left is the window installer. And then we were responsible to make it airtight from the inside. He was responsible from the outside and it's that coordinated teamwork that needed to happen. But a mock up breaks down barriers, brings people to the place where the work is happening. And you're able to cognitively talk about how you're going to install that window. If you could do that in every one of the round circles on edge red pen tests, you have great teamwork, and you've got a process of trying to almost like find where your failures are going to be before they actually become failures.
All right. So here, we're going to talk about technology. So part of tech Tuesday or former tech Tuesday, I'm sorry. Wednesdays here was technique technology Tuesdays and I'm screwing this up already. It's been a long day. So the technology that I'm going to bring is infrared cameras. All right. So infrared cameras do help me see the invisible, but I can't see anything with airtightness unless I'm running a fan at some pressure. So what this image shows is that by running a fan at five Pascal, a little bit of leak, 10 in Pascal, see a little bigger 25, I see a real big leak. And then 50 Pascal, I see a very large leak and I can start to see that streaking that's happening, bringing the cold air from outside to inside. And I can see those defects. Otherwise they're completely invisible to the naked eye.
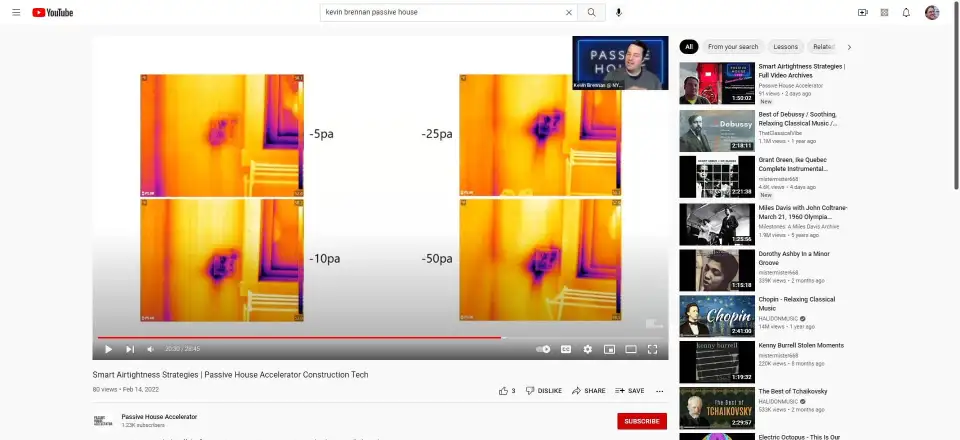
The sad part of this reality is, is that the infrared cameras and the leaks really don't work that well on thin membranes. So it has to go over a hard surface to really develop that streaking that we see in this picture. So it would be more of a finish blower door test. But I have used the infrared camera to find leaks like water leaks in the membranes and things, but it is a tool to use so that you're scanning the building smart and being smart about it. The next tool here is called a hot wire anemometer. It's just an electrical device that measures the quantity of air going past it. It's a wand that can telescope and there's an air barrier on the wall there. And that's measuring that there is a very large leak there at 14 to 1500 feet per minute. So we're actually measuring the amount of air going past that device there. It's a very sensitive device.
So with the fan running either negative or positive pressure, I can read the numbers that it's happening. And I can quantitate what a big leak is and a small leak is. Whereas with the smokes stick, I can only say that's where the leak is. I prefer the smokes stick because it tells me exactly where to seal and I have to figure out how do I solve and plug that hole. This is the next reason why you would use a smoke stick is because it helps you find mistakes like this. This poor innocent, very innocent prideful, HVAC installer just didn't know that membranes melt. He just didn't know that taking a torch and brazing HVAC pipes would melt the plastic and potentially burn the project down and ruin my air barrier, but we're able to find it, solve it and fix it by doing a blower door test and showing him and bringing them by the hand and be like, "Bro, this is what happened. You can't do this." And the GC has to help the teamwork there.
This is the sheets, installing the sheets in that roof using a little bit of technology of the pneumatic stapler going across there and good teamwork and training the people installing the membrane, how you do it, why you do it and what airtight is. So the technology of air barrier systems is using smart grommets that reduce labor, but make the job easy. I give that grommet to a plumber or an HVAC guy. They install it on the pipe. And then I come back and I put four strips of tape on it. I press it. It's clean, it's dry. And it's 100% sealed. Otherwise it would take me manually, 10, 15 minutes to clean it, to prep it, to put it across. Technology of installing self adhere membranes with an innovative process, this as a 3m product at an air barrier training, they're rolling the membrane up and then pulling the release paper off and down a very nice technique. They also have a vapor open product as well, which is kind of cool.
So air barrier systems going in, I like the 3m membrane on certain wall types, because it's opaque. You can see through it and... Translucent is what I should say. And you can see where the screw heads are. A defects might happen, but I haven't had the ability to work with the product yet on a commercial building.
Next one is a pull test. So if your job recommended a self adhered membrane that should be fully adhered to the outside of the building and you want to check the adhesion, you check the adhesion by gluing a disc on the outside and then doing a pull test and the pull test should be fully adhered. And there are certain numbers that go along with it. This is a part of the ABAA, and it's three disc equal three tests.
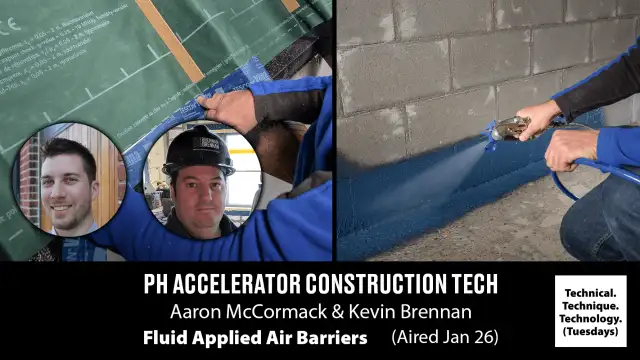
Next one is the fluid applied air barriers, which is one of my favorite parts of the latest process of installing these flashings is that it makes three-dimensional inside corners, outside corners kind of easier. And that gun you see there is a 12-volt sausage gun that installs instead of breaking your hand the next day, especially in the cold, it's installing that membrane nice and easy. This is the product from... This is who? This is Prosoco. This is Prosoco's product. And you'll see some of this on the showcase next week. But you can see the gentleman there using a hand sausage gun and then smoothing it out.
The real trick to this is just making sure it's on at the right thickness. Each manufacturer has a different thickness. And where would you find such details? You would find it in the technical data sheets.
So one of the parts of the training is to get people to read the technical data sheets, read the instructions, know the limitations of the products. And sometimes that happens in a mock up, sometimes that happens in a training, sometimes it happens by a good team and a bunch of nerds going through it.
This is a blower door test on a four unit building for code compliance. It's a little shocking there, but I have four blower doors going at once to test a four unit building for code compliance. It's a small fan and a big fan, go up the stairs, all to the other, and I've got two more fans run it. So the point here is that any building can really be tested. Large or small, by coordinating the fans and putting them together. By getting equal pressure on all six sides of the building, you're getting a very good testing process.
And this is... I don't know if you guys have sound or can hear sound. I doubt it, but this is my good friend, Jason Andres, another tradesperson that I ask him, "What would you think if I told you the blower door test results were 0.32 on your test at roughing?" And he was like, "Oh yeah, that's awesome. Point 0.28, 0.29. It's one of the tightest projects I've ever tested." And that is a self adhered membrane on the outside. And that's a perfect time to do your tests is when it's roughened and everything's done. And him and the guys that work on his team are very proud of that.
But you could see my cache of tools there, the hot wire anemometer and the smoke stick ready to check and find leaks. But I was a happy guy that day because there was no leaks to check and find. There was a very good system done and proud team.
This is troubleshooting a window of doing a ASTM 783 test, building a chamber on the inside, testing one of the windows, blowing smoke on the outside and pulling air in, in the chamber built in the inside and trying to video if there were any defects within that chamber. So that's a large amount of smoke and it's not easy to see where it's coming in. I like the small smoke stick pointing me right to where the mistake is.
This is probably a Blair Witch Sweaty Project of a chamber that we build on multifamily projects. And it's a chamber big enough to where somebody can go inside, depressurize it and check all the details with a small smoke stick. And that's called a, what we call the dirty passive house 783 test is that we boost it to 50 Pascal like the final test pressure and we troubleshoot and find all the leaks from the inside with the smoke stick or even the hot wire anemometer. This is us inside the box here with the smoke stick trying to find where the leaks are.

